Opt for a green food storage solution with this easy DIY from the Beekman Boys!
Going greener around the home can seem like a daunting task, but reducing your plastic consumption can be easy and fun thanks to this simple DIY from the Beekman Boys. Using ingredients and materials you may already have around the house, you can easily create beautiful and reusable alternatives to plastic wrap! These food wraps are made of recycled fabric and a beeswax mixture and can last a few months with simple care. Customize your food wraps by choosing eye-catching vintage fabrics, and create a variety of sizes to suit any task! They also make a thoughtful green gift for the eco-conscious guru or cooking aficionado on your Christmas list.
Materials:
- 100% cotton fabric; size and pattern of your choice
- Water (for double boiling)
- 1 cup beeswax
- ¼ cup tree resin (pine is good)
- 2 tbsp jojoba oil
Tools:
- Pinking shears or sharp scissors
- Oven
- Medium-sized pot
- Mason jar
- Oven gloves
- Clean paintbrush (or pastry brush)
- Clothespins
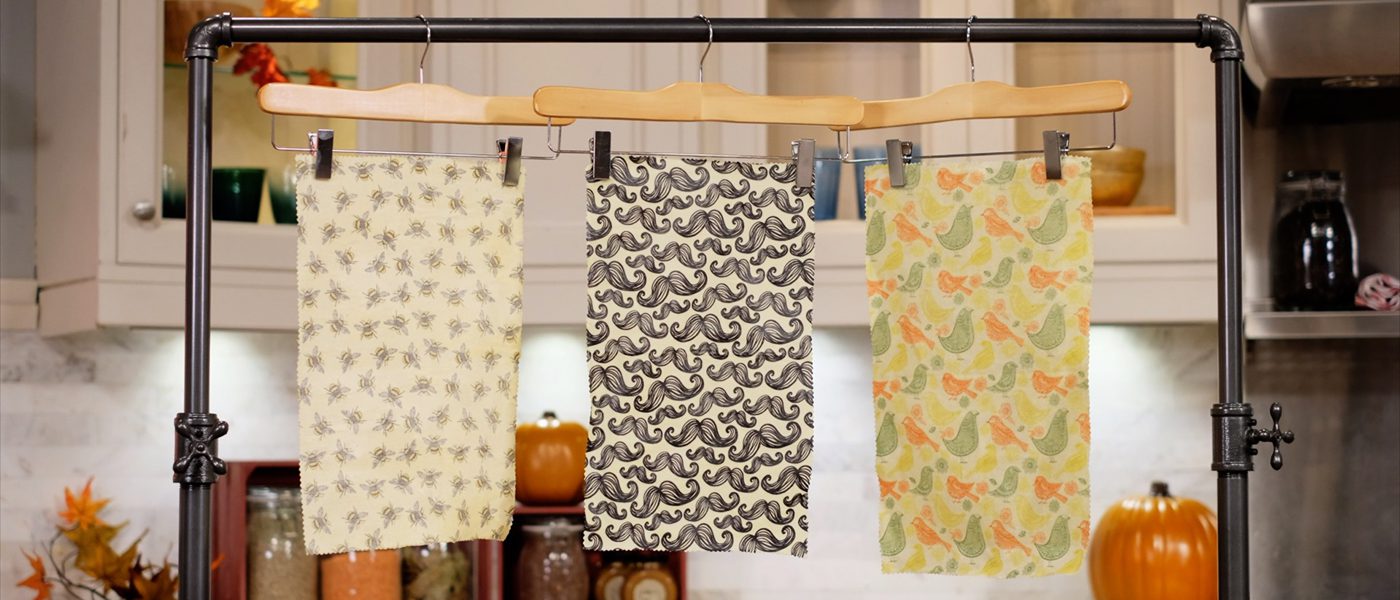
- Indoor clothesline or coat hanger
- Wax paper
Instructions:
- Cut your fabric to size. You can use any scissors for this, but pinking shears are best, as their zigzag cut prevents the fabric from fraying.
- Heat your oven to 300°F.
- Fill the cooking pot halfway with water, then set it on the stove to boil.
- Place the beeswax, resin and jojoba oil in the mason jar. Put the lid on tightly, and then immerse the jar in the water. When the water is boiling, the mixture in the jar will start to melt.
- In the meantime, line a baking tray with the waxed paper and lay a single piece of fabric on the tray.
- When the mixture has fully melted, put on oven gloves, remove the hot jar from the boiling water and carefully drizzle the beeswax mixture over the fabric. It will harden quickly, but you’ll have a chance to smooth out the wax at the next stage, so don’t worry too much if it’s a bit uneven at this stage.
- Place the tray in the oven for a couple of minutes to reheat the beeswax. Pull the tray out and use the paintbrush to spread the mixture evenly over fabric, then return the tray to the oven.
- Lay some newspaper over your work area, then remove the tray from the oven. Use two clothespins to pick the fabric up at the corners and hold it over the newspaper while any excess wax drips off.
- Pin the fabric on an old coat hanger or clothesline. Let your wrap dry for a few hours before using.
Quick Notes:
- Ideal for storing anything except meats and really acidic foods
- Between uses, rinse in cool soapy water and let air dry
More from the Beekman Boys at TSC – Today’s Shopping Choice here.